Ethical Hacking – DVWA Installation

On this post, I will discuss about DVWA installation. But first of all, what is DVWA? DVWA stands for Damn Vulnerable Web Application. It is actually a PHP/MySQL web application that is very vulnerable for students or ethical hackers to try and test their skills of hacking in a legal environment. For the sake of learning, we will install this in our Linux within the virtual box.

Here are several steps to install DVWA

1. Open the terminal and go to /var/www/html using the cd command: cd /var/www/html

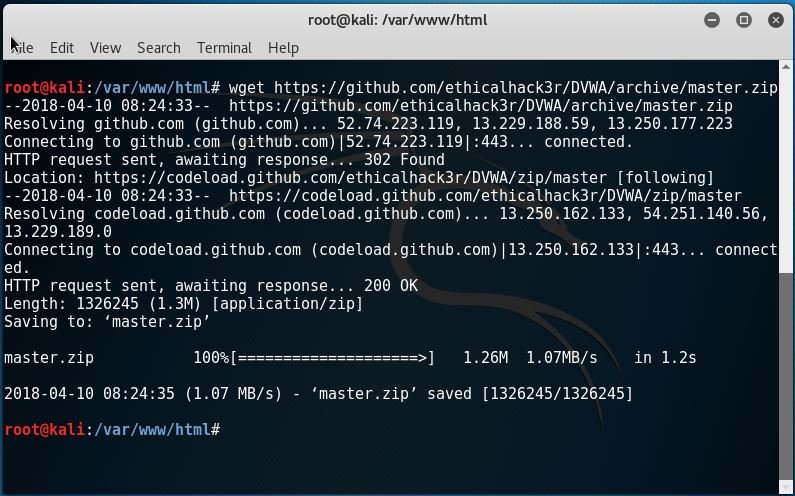
2. On the current directory, download the master.zip file for DVWA from https://github.com/ethicalhack3r/DVWA/archive/master.zip with wget. It looks something like this:

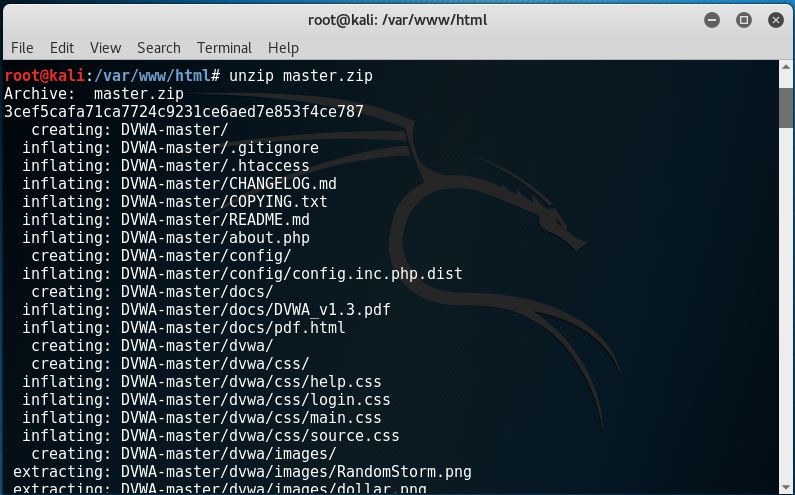
3. Unzip the file like this:

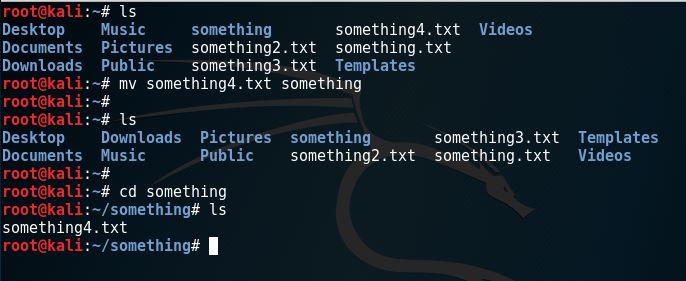
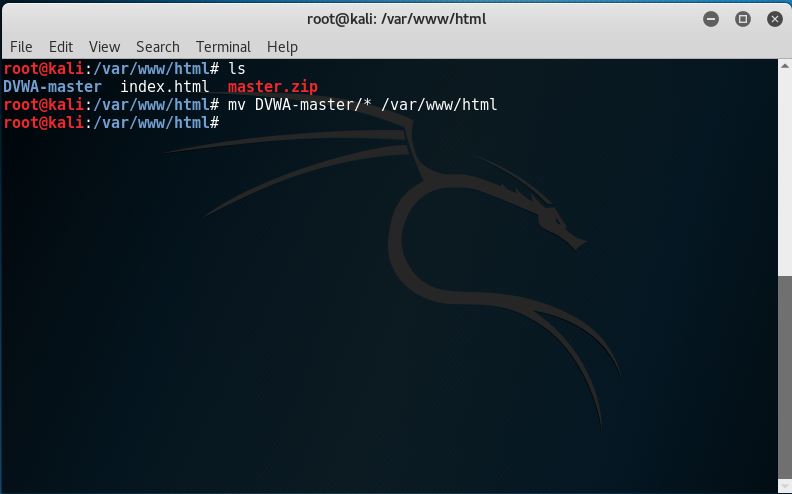
4. Check whether the file is there or not using ls.

5. Move the DVWA-master file to the web root directory like this: mv DVWA-Master/* /var/www/html

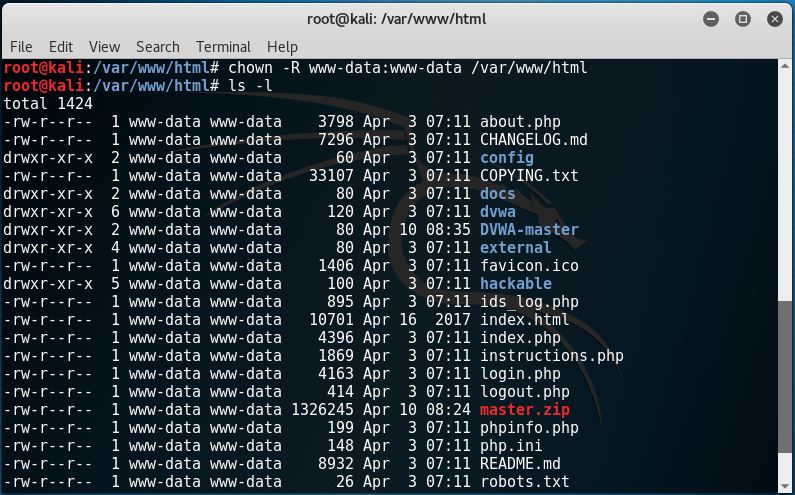
So now, we have the DVWA files inside /var/www/html and it now looks like this:

6. Change the owner of the /var/www/html directory with chown to: chown -R www-data:www-data /var/www/html

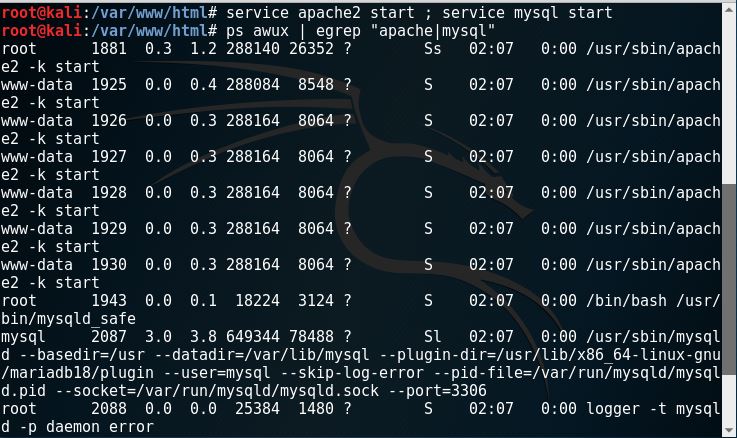
7. Set our apache and MySQL services by typing in “service apache2 start; service mysql start”. Then, type in “ps awux | egrep “apache|mysql”” like this.

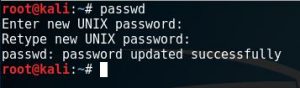
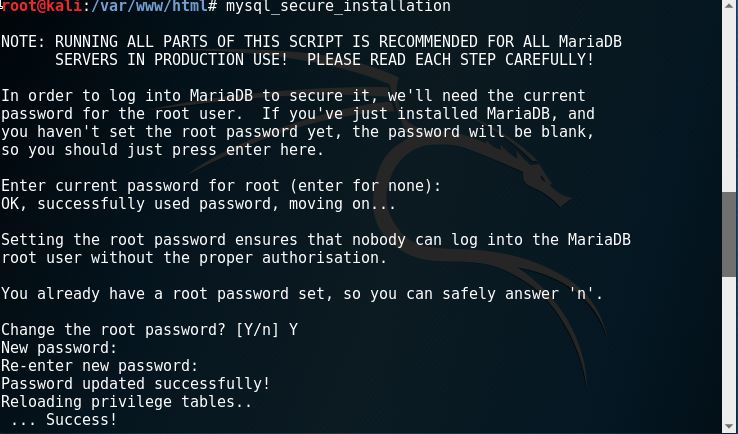
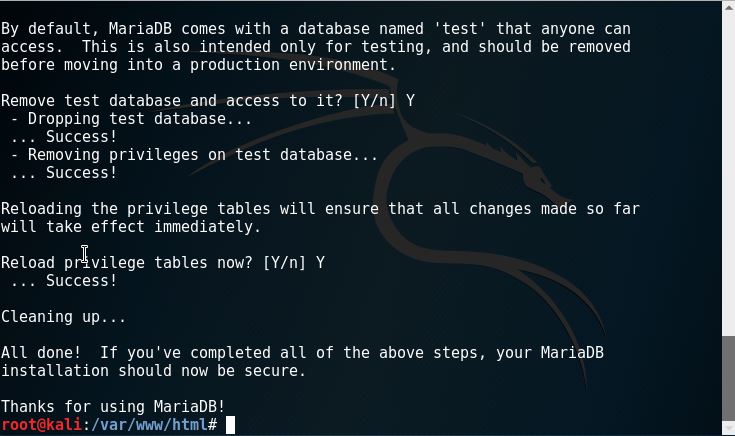
8. Securing MySQL installation by typing in “mysql_secure_installation”. Make sure on the first step to fill in the password. Then just fill in yes throughout the installation.

9. Try to see our DVWA page on our Kali’s browser by typing in the local IP 10.0.2.15.

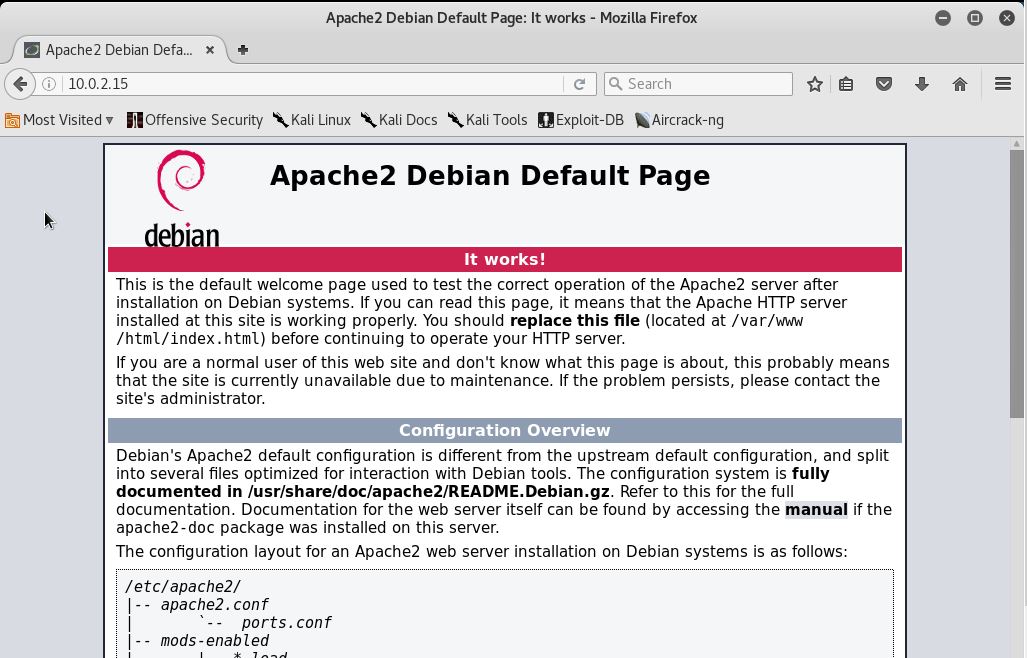
If you see this page, it means that the apache service is already running. But it isn’t exactly the page that we’re hoping to see. To get this fixed, inside the /var/www/html, we’ll see the index.html file. Remove that file and now we’ll see this.

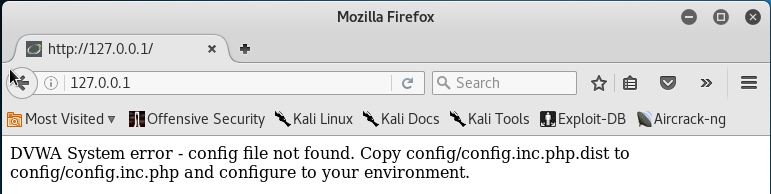
This is almost the right page. All we need to do now is follow its instructions by changing the config.inc.php.dist file in config directory to config.inc.php like this.

We’ll get the right page after refresh.

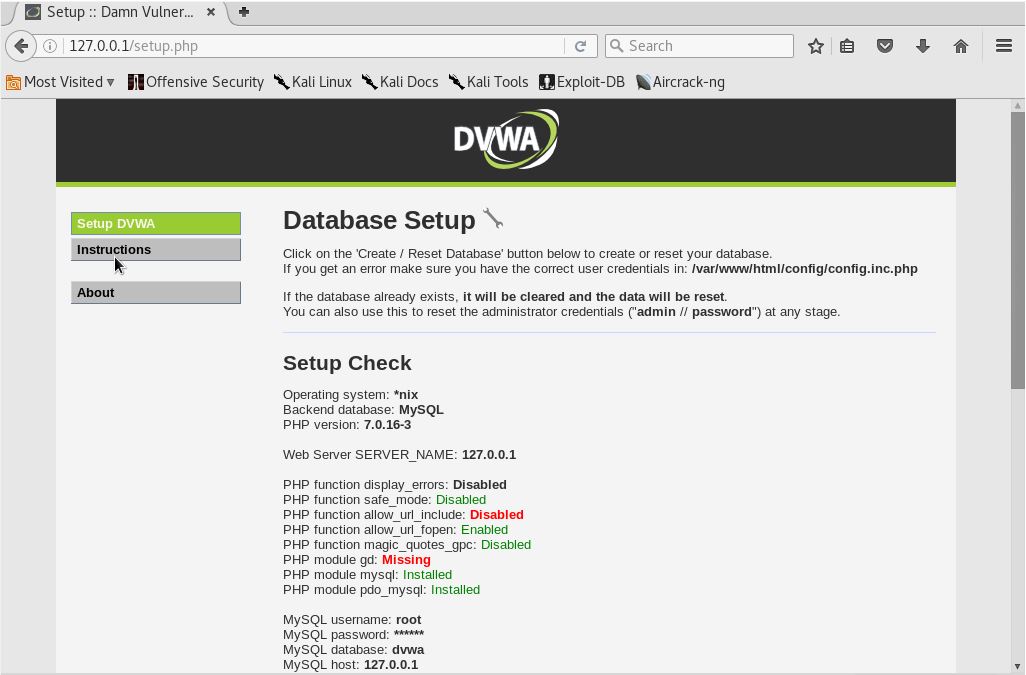
8. After getting the right page, we’ll see a reCAPTCHA error (missing) on the bottom part of the page.

To get the reCAPTCHA keys, we’ll have to go to www.google.com/recaptcha/admin.

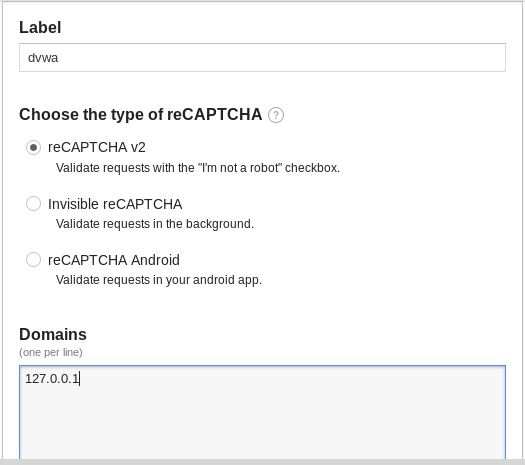
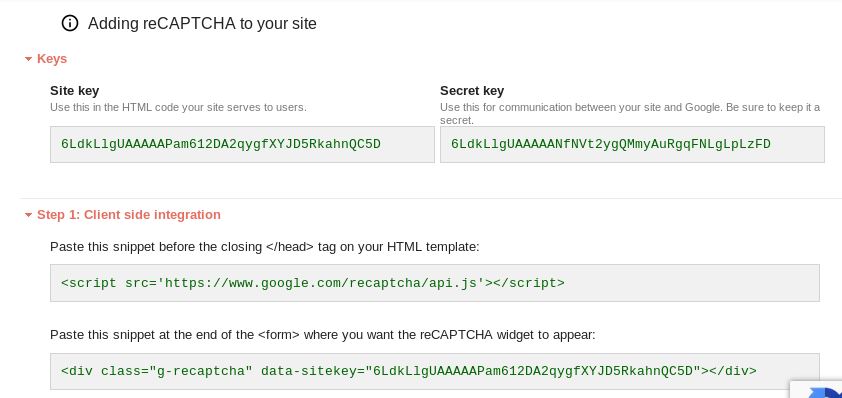
Then, we’ll have to add the keys to the config/config.inc.php file.

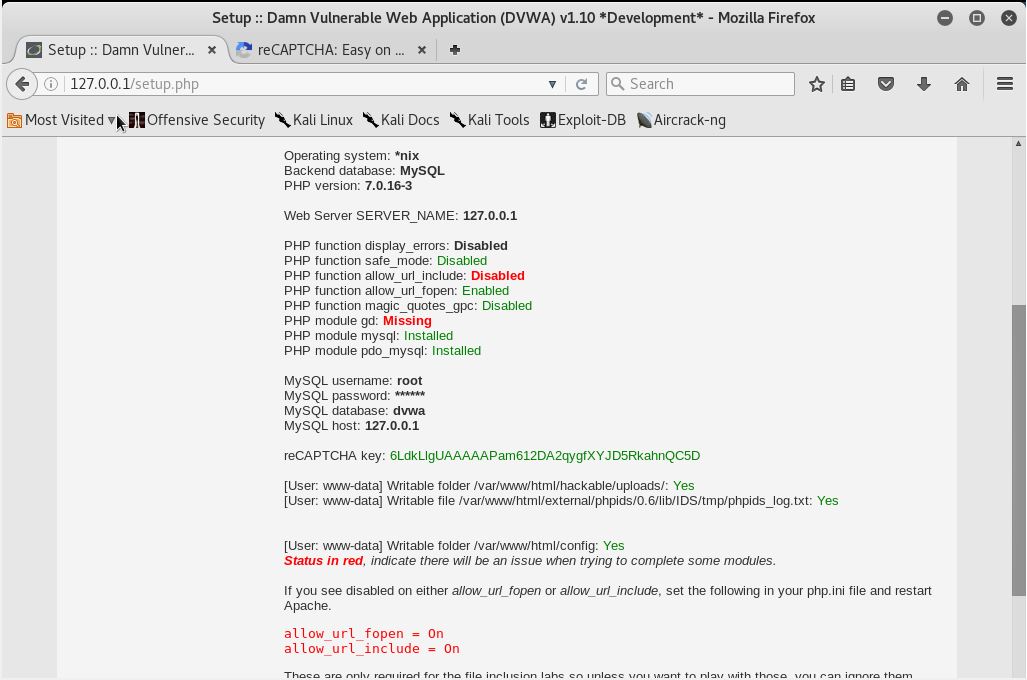
9. After resolving reCAPTCHA, we’ll have to resolve the ‘allow_url_include’. Simply edit the php.ini under /etc/php/7.2/apache2. Mind that the directory of 7.2 may be in different version. Open the php.ini file, find the ‘allow_url_include’ string, then set the value to ‘On’.

Save and exit the file.

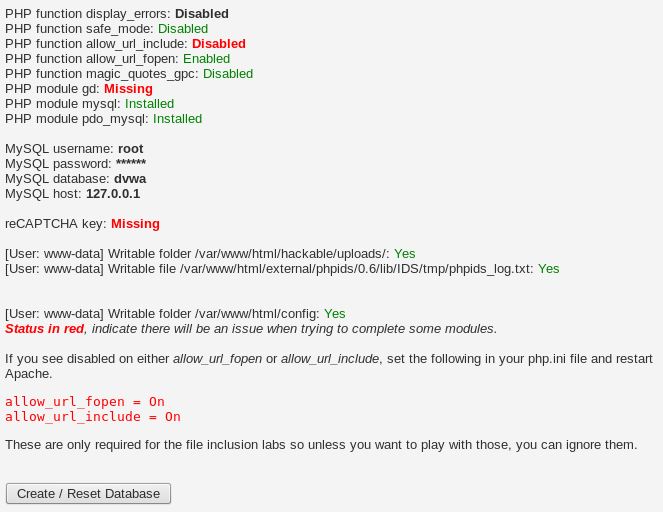
10. Another thing we’ll have to resolve is the PHP module gd part. Simply type in ‘sudo apt-get install php7.2-gd’. A note to remember, mind the php version we use as different versions of installation might not work at all.

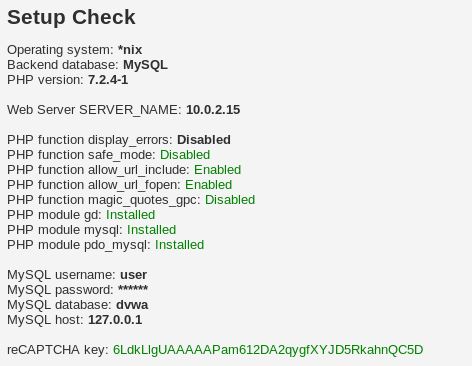
Restart the apache2 service and refresh our browser. We’ll see that all the red status are resolved.

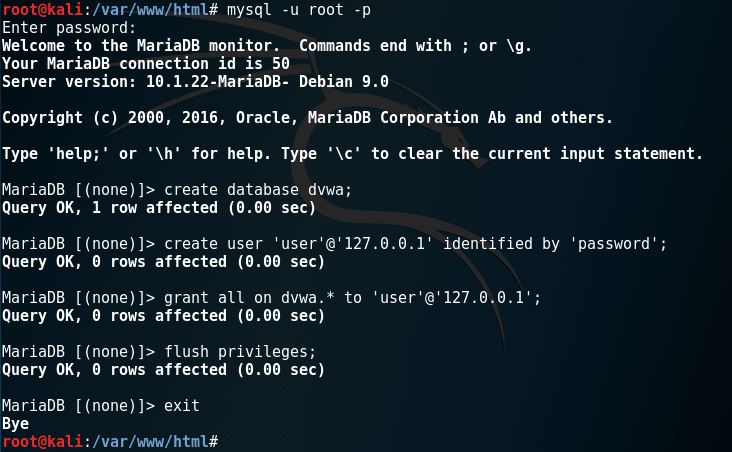
11. Create the database through terminal by typing in “mysql -u root -p”, then enter the root’s password you made earlier.

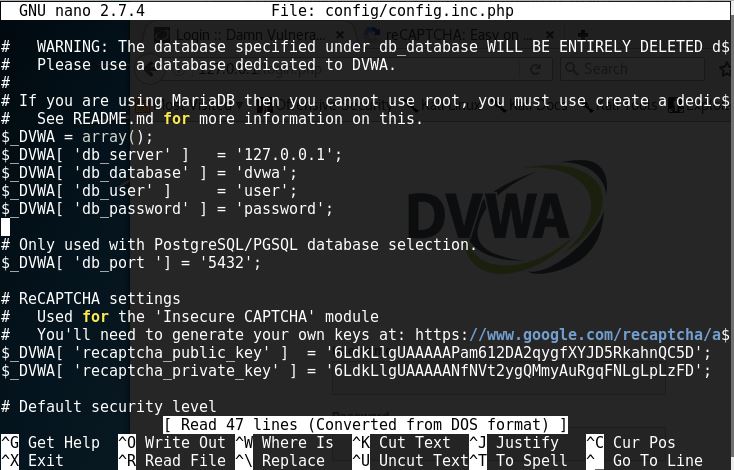
12. Change the config/config.inc.php file again and change the user and password to the user that we made on the previous step.

Then, refresh the browser page and click on the ‘Create / Reset Database’. This is what you should get after that.

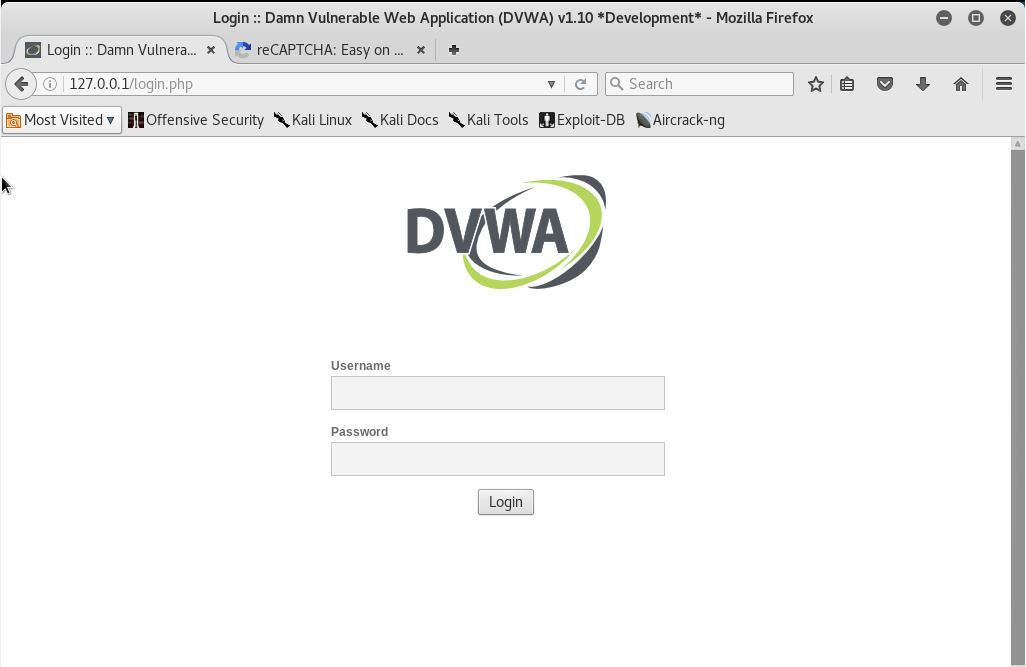
The installation is done! The default username is ‘admin’ and the password is ‘password’.


Ethical Hacking – Enumerating Target

Enumerating in ethical hacking is the process of getting shared resources, users and passwords of the target. Of course, there are several tools that Kali offers us to do this. Here are a few that I’m going to demonstrate.

1. wpscan

Wpscan is a wordpress vulnerability scanner. There are several uses of wpscan, including enumerating users and passwords. So let’s enumerate jo1.pentest.id and look for users.

The process might take awhile, but the long wait might also bear fruit. So here is what we get from enumerating users with wpscan.

Now that we know the username, we would like to know the password. In this case, we’ll try dictionary brute forcing with wpscan. First, we’ll have to create the ‘dictionary’. The dictionary is the list of word trials that we want wpscan to use to try breaking in. Let’s create a file called ‘pass’. Type in “nano pass” and we’ll get into the text editor.

Exit and save the file. Now we go to wpscan again and do this.

What the command does is try to use adminjo as the user and use the dictionary of passwords that we created to try and get through. It will also take awhile, or also, we might even fail to get it. There are other ways to check if we fail to get the password, but we’ll focus on this one first.

Here is the result of wpscan’s dictionary brute forcing.

2. theharvester

The objective of theharvester is to gather emails, subdomains, hosts, employee names, open ports and banners from different public sources like search engines, PGP key servers and SHODAN computer database. Let’s try using it.

From the command, -d facebook.com means that the domain we want to search on emails is facebook.com. -l 50 means that limit the search to 50 and -b all means that we search by all the search engine such as google and bing. Here are several results of the search, including several hosts.

3. Metasploit

Metasploit provides a public resource for searching vulnerabilities and gives the opportunity for the users to create and develop codes for exploiting. Let’s try and use it.

As shown above, using metasploit, we have successfully retrieved 1 email address.

References

https://wpscan.org/

https://tools.kali.org/information-gathering/theharvester

https://whatis.techtarget.com/definition/Metasploit-Project-Metasploit-Framework

Ethical Hacking – Using Maltego

The focus of Maltego is analyzing real-world relationships between information that is publically accessible on the Internet. This includes footprinting Internet infrastructure as well as gathering information about the people and organisation who own it. On this post, I will show what I have done by using maltego.

1. Open maltegoce from Applications under Information Gathering.

2. The first thing you’ll encounter is that we have to choose the maltego type we want to use. Click on the Community Edition. Then we must login. Make an account first if you don’t have one by clicking on ‘register here’. It will open your browser to the website to register.

3. After logging in just click next until you encounter the Install Transforms section. Choose Run a machine.

4. There are several machines available for us to use. The main ones are Company Stalker(gathers email information), Footprint L1(basic information gathering), Footprint L2(moderate information gathering) and Footprint L3(intense and most complete information gathering). We’d like to gather as much information as possible, so we’ll choose Footprint L3.

5. Specify our target. In my case, I’ll try to target pentest.id for learning purposes.

Click Finish.

6. Wait for awhile. If the program asks about anything, just click on yes. We’ll get to see an entire map of pentest.id after that.

Zooming in, we’ll see this.

We can see its relationships to the websites.

References

https://www.paterva.com/web7/buy/maltego-clients/maltego-ce.php

https://null-byte.wonderhowto.com/how-to/hack-like-pro-use-maltego-do-network-reconnaissance-0158464/

Ethical Hacking – Target Scoping and Information Gathering

On this post, I would like to cover up some of the Ethical Hacking Cycle steps. I mentioned these steps on my previous posts. But the explanation there was not very detailed. So, I have decided to give more explanation based on what I have learned.

a. target scoping

Target scoping would actually be the second step right after making a contract with the client. The benefits of Target Scoping is that we’ll know our objectives, we get to plan better before penetration testing and we get to save more time and energy. Here are several key concepts of Target Scoping:

1. Gathering Client Requirements
This key requires us to dig more about what the client wants us to do. It can be done by thorough communication with the client. It’s also better that we prepare questions beforehand.

2. Preparing Test Plan
Preparing the test depends on what we need. These may include shaping the actual requirements into structured testing process, legal agreements, cost analysis, and resource allocation.

3. Profiling Test Boundaries
Determining limitations on the project itself. Whether its the technology, knowledge, or restrictions given by the client’s IT environment.

4. Defining Business Objectives
Aligning business view with technical objectives of the penetration testing program.

5. Project Management and Scheduling
Management and Scheduling is also an important part so that

b. information gathering

On this step, as mentioned on my previous post, we’ll be gathering public information about our client. There are many things that can be found such as the client’s name, address, website, contact person details, email address and telephone number. There are a list of tools that we can use to look for these information.

1. Google Groups

Google has many uses in terms of searching. In google groups, we can get emails of our client. It should be useful as we can send spam messages and messages that may contain malicious software. The use of it is also to test the ‘people’ layer of the company or the individual.

Here is an example of how searching in google groups looks like.

Since this is just an example, this is a random search. It would be better if you plan on what you want to get beforehand. It’s not difficult, but if we don’t know what we’re looking for, it won’t be easy either.

2. whois

The whois command is a very common command to use for information gathering. Through this, we can get the registrant data of a domain including the name, email, address and phone number. Here is an example of whois results through the terminal.


Another way to check whois results is through the www.whois.net website. Here’s a look of how we run it there.

3. dig

4. DNSTrails / SecurityTrails

DNSTrails, now securitytrails, is a web that let’s us search for the history of any domain, the subdomains and also giving us whois results. Here is what it looks like when we use it.

Notice that there are strange letters such as A or AAAA? Here is what it means:

1. A: The A stands for Address. It gives us the IPv4 records for the given host.
2. AAAA: This one is also an address, similar to A. But the version of the address is IPv6.
3. MX: Stands for Mail Exchange. It is used by the Simple Mail Transfer Protocol (SMTP) to route emails to proper hosts.
4. NS: Specifies the authoritative name server.
5. SOA: Stands for Start of Authority. Specifies core information about a DNS zone, including the primary name server, email of the domain administrator, the domain serial number and several timers relating to refreshing the zone.
6. TXT: The text record simply holds arbitrary non-formatted text string. It is used by Sender Policy Framework to prevent fake emails.

5. Paros

Paros is one of the powerful tools for information gathering as it captures web server information and gives us possible vulnerabilities that could allow exploits. The application is already provided in Kali Linux. But if we’re using another operating system, we must first download Paros at www.parosproxy.org, which then redirects you to this website.

Make sure that we have Java J2SE installed. Then, we install paros.

After getting everything set up, we expect to be on this screen.

What we can do now is setting up the network environment. First, check the local proxy from Paros by clicking tools, then options, then select local proxy.

We can see that the address is 127.0.0.1 in port 8080. Change the connection settings in the browser by opening menu, then preferences/options, then select advanced. Click on the network and manage the connection by clicking settings.

Change the connection settings as demonstrated below.

After the settings are done, search for a website. This will show up in our Paros.

As you can see, there are some alerts; low and medium. These alerts display vulnerabilities that were found by Paros.

6. Other tools

There are many more web tools that we can use for information gathering. Here are a list of tools that may be helpful.

For information on Devices and Computers:
1. archive.org
2. www.domaintools.com
3. www.alexa.com
4. serversniff.com
5. centralops.net
6. www.robtex.com

For information on people:
1. www.pipl.com
2. yoname.com
3. wink.com
4. www.isearch.com

References

https://www.hackingloops.com/target-scoping-guide-penetration-testing-pen-test/

http://dns-record-viewer.online-domain-tools.com/

Introduction to the Paros Proxy Lightweight Web Application Tool

Ethical Hacking – Linux Basic Commands

In this part of the journal, I would like to discuss about the importance of understanding Linux, Kali Linux to be more precise. Why are we learning this? Well, Kali Linux has a lot of tools that helps us to do penetration testing (pen test). Also, most ethical hackers use Linux-based OS to do pen test.

1. cd

The first and most basic command that will be discussed here is cd. It stands for change directory. Changing directory is a very crucial thing when we work on anything. The cd command exists in most OS including IOS, Windows and so on. To put it simple, changing directory means that we can switch back and forth to wherever folder we want to work on. For example, we are on the ‘home’ directory, we want to make a file in the ‘documents’ directory. What the user can do is ‘change’ the ‘directory’ from home to documents. The cd’s syntax is cd [option] [directory]. For the example above, the use of cd should look like this:


There are several other uses of cd. If we’d like to go back to the parent directory, we can just type in ‘cd ..’. A single dot represents the current directory, while double dots represents the parent directory. Another cd use is going back to its roots by simply typing ‘cd /’. The slash represents the root directory.

2. ls

The second command is ls (the l is an L). The ls command is to list all the files in the directory. The syntax for ls is: ls [options] [file/directory] Here is an example of the ls results:

The ls command has a list of additional options to choose from:

  • ls -l: shows file’s or directories’ names, size, modified date and time, owner of the file and its permission.
  • ls -a: shows all files including hidden files
  • ls -lh: shows a more readable format of ‘ls -l’
3. ifconfig

The third one would be ifconfig. This command would be an indicator whether you are connected to the internet or not. If we use virtual machine, then make sure that your network settings is set to NAT. Otherwise it would ask you to use a cable instead of WIFI. Here is what the settings look like:

Another alternative to this issue is to change the connection into a Bridged Adapter and make sure the ‘Name:’ is the hardware device that is used to connect to the WIFI.

Another way to see whether we’re connected is to use the ping command. The ping command allows you to check both your internet connection and to test whether a host is reachable. Here is an example of ping test:

Here is also an example of a ping test that failed to connect to a host:

4. cat

cat is one of the most used commands to read, combine and create files. The syntax to cat is cat [options] [filenames] [-] [filenames]. Here are examples of how the cat command can be used.

On the first line, we can see that the cat command opens the file and writes the text out in the terminal.

The second part is a method we can use to copy a file into another file of a different name.

The third part is basically creating a new file and with us writing its contents. Don’t forget to press enter first before exiting the cat, otherwise the last line of the file won’t be written. To exit the editing mode, just press Ctrl+c.

The fourth part is opening the files and concatenate the output.

The fifth part is copying the concatenated output of the files.

This last part is to identify the use of the ‘>’ operator. When we make a file using cat for the first time, we use the ‘>’ operator. But when we want to continue adding anything on the next lines, we use the ‘>>’ operator so that the file is not overwritten.

5. nano

nano has very similar uses to cat. Only, it’s more like a text editor. To make a new file, just type in ‘nano file.txt’ this will open the text editor in the terminal with a blank page. Later upon exiting the text editor, the system will ask to confirm the file name. But if we want to open and edit an existing file, just type in the file name. Here is an example of using nano.

As you can see, there are other uses by using the guide below the file. For example, if you want to open Get Help, just press Ctrl+G.

6. mkdir

mkdir is making a new file directory (make directory). It’s useful if we want to store files according to its category.

7. cp

cp stands for copy. This command simply copies a file or directory into another new file or directory. Here is an example how to use it.

So we type in ‘cp’, then specify the file/directory we want to make a copy of, then specify the name for the other copy.

8. rm

rm stands for remove. The command, as it says, removes (deletes) files that we want. But it doesn’t ask for confirmation to execute so we have to be careful on using this command.

9. clear

This command clears the screen of the terminal so that we can work easier. Here’s an example of using the clear command.

10. passwd

We might forget our passwords sometimes. With the passwd command, we may change our current user’s password by typing in passwd and input the new password twice.

11. mv

mv stands for move. This command moves a file to another location. It may as well rename a file.

Here is an example of moving a file.

Here is an example of renaming a file.