Ethical Hacking – Playing with DVWA

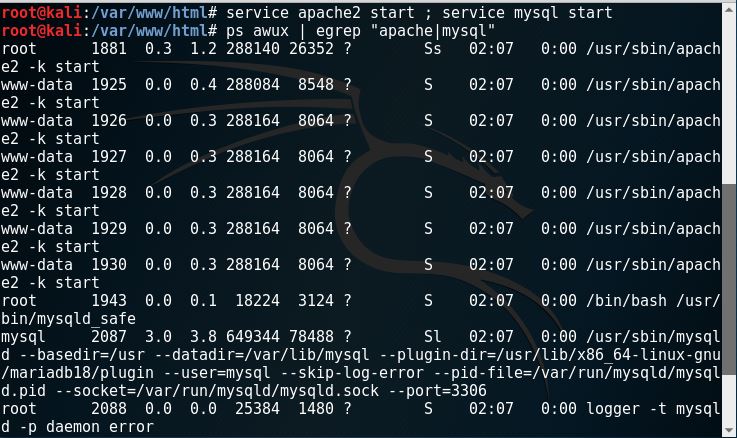
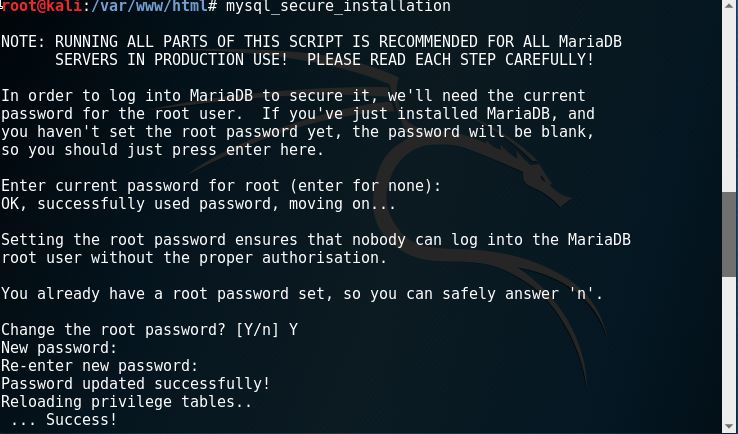
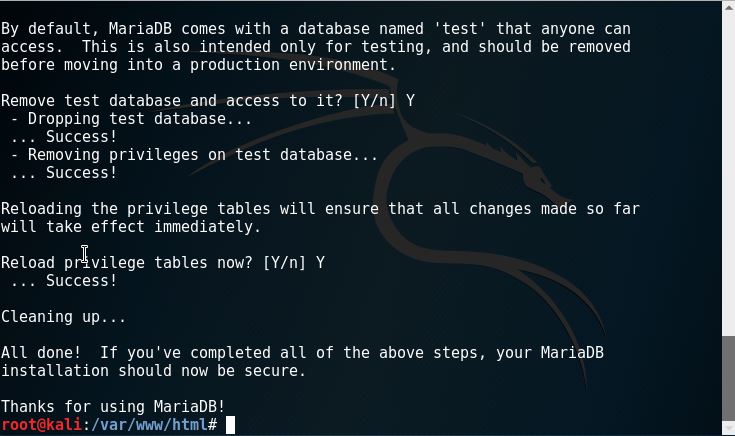
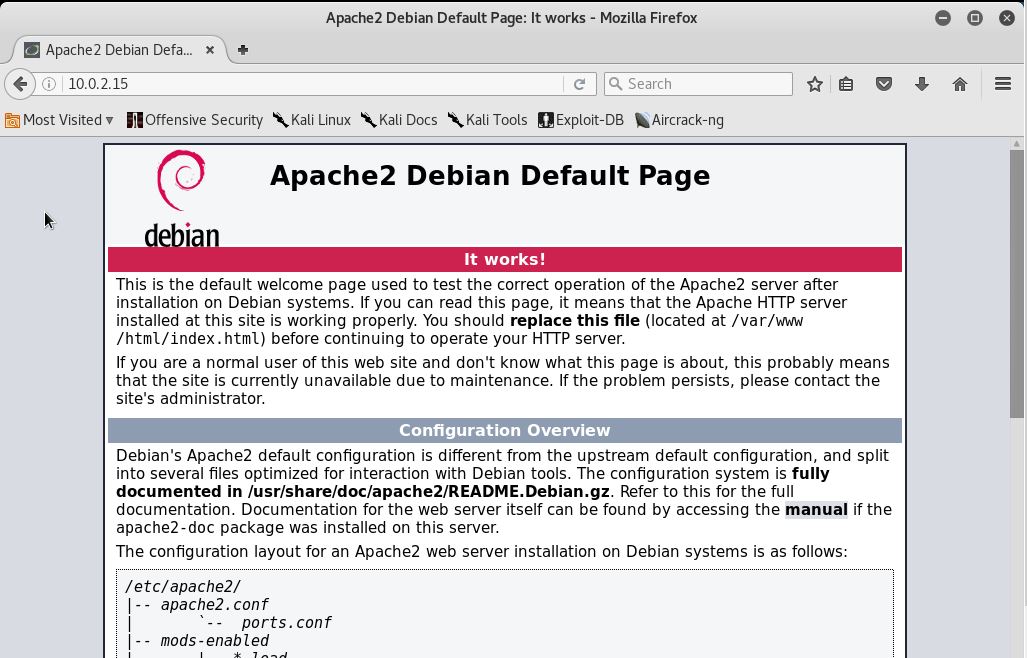
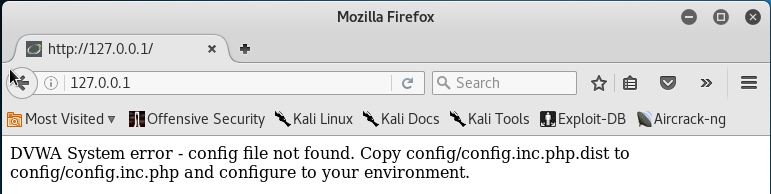
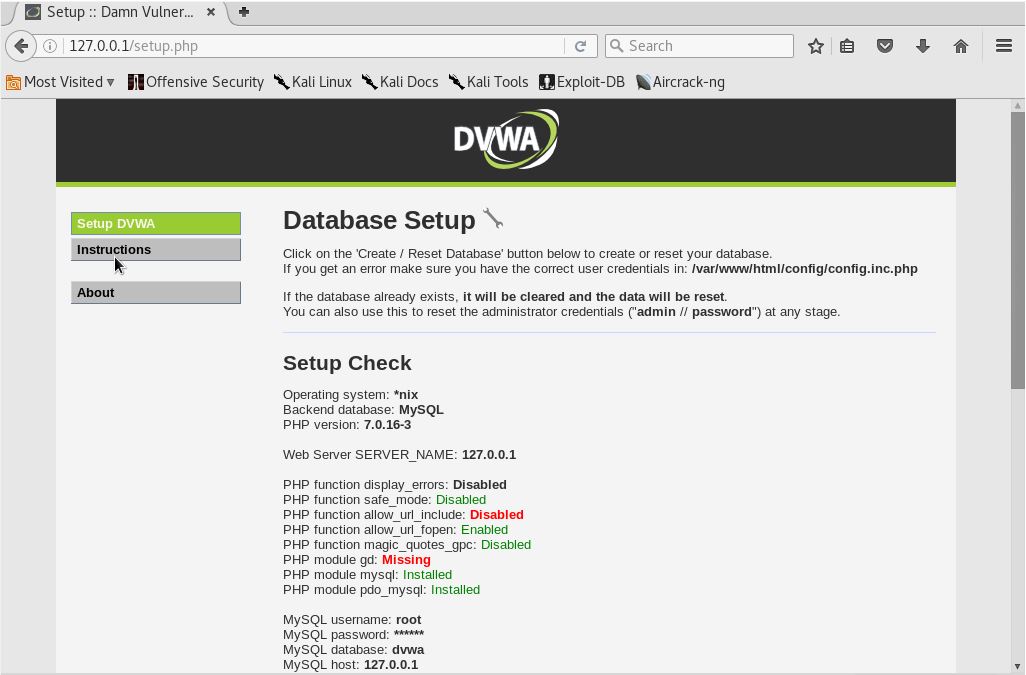
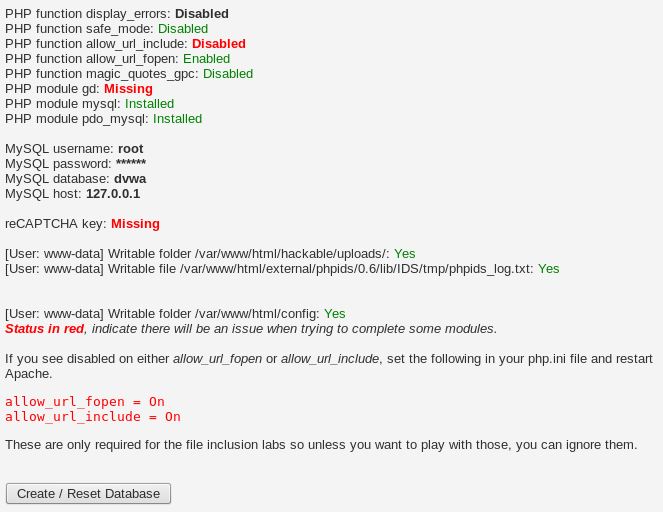
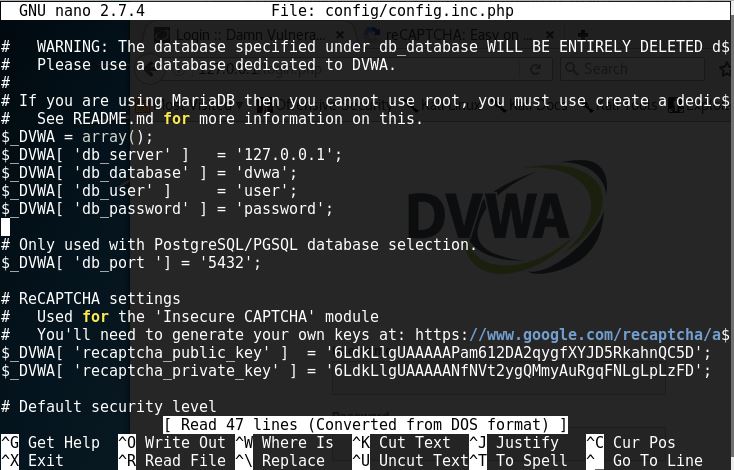
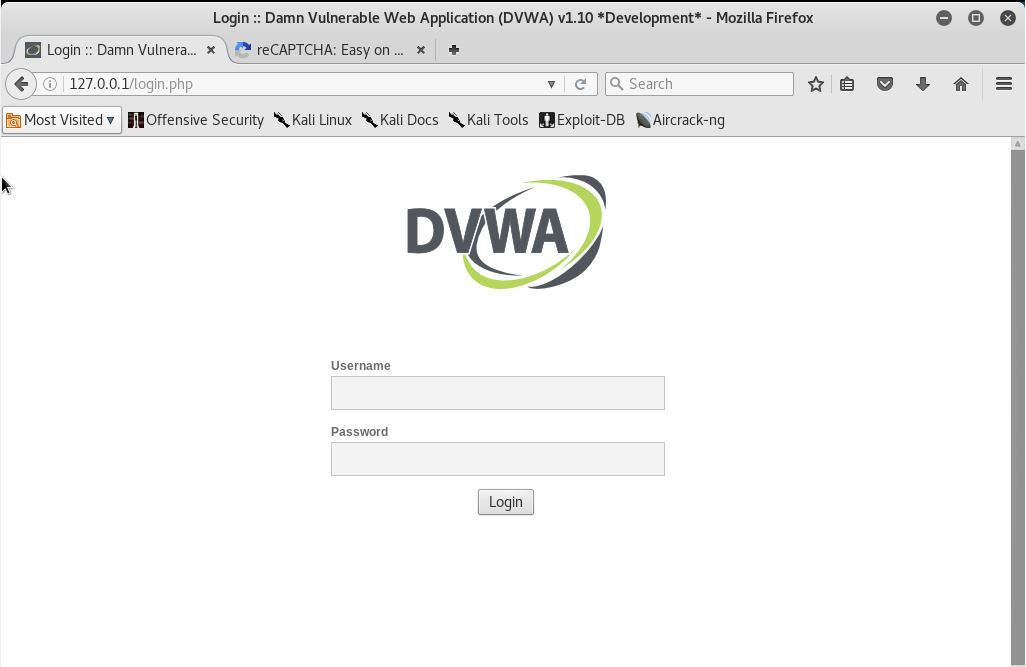
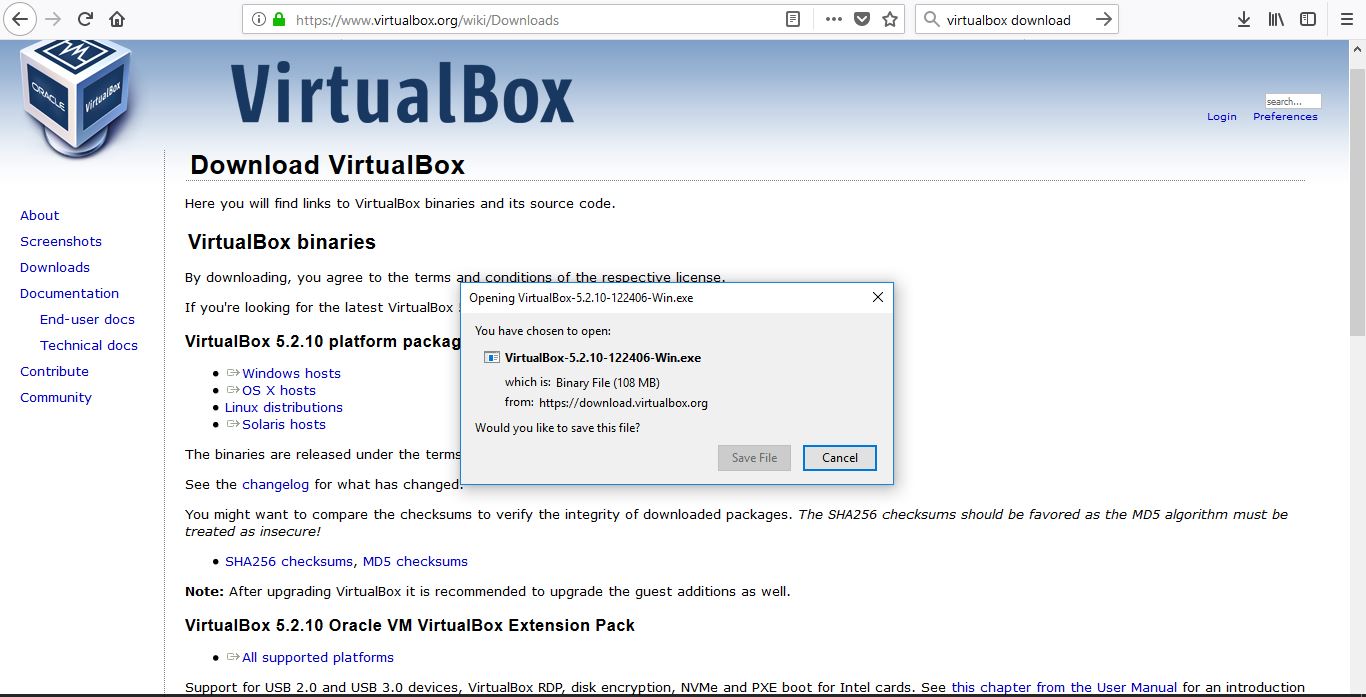
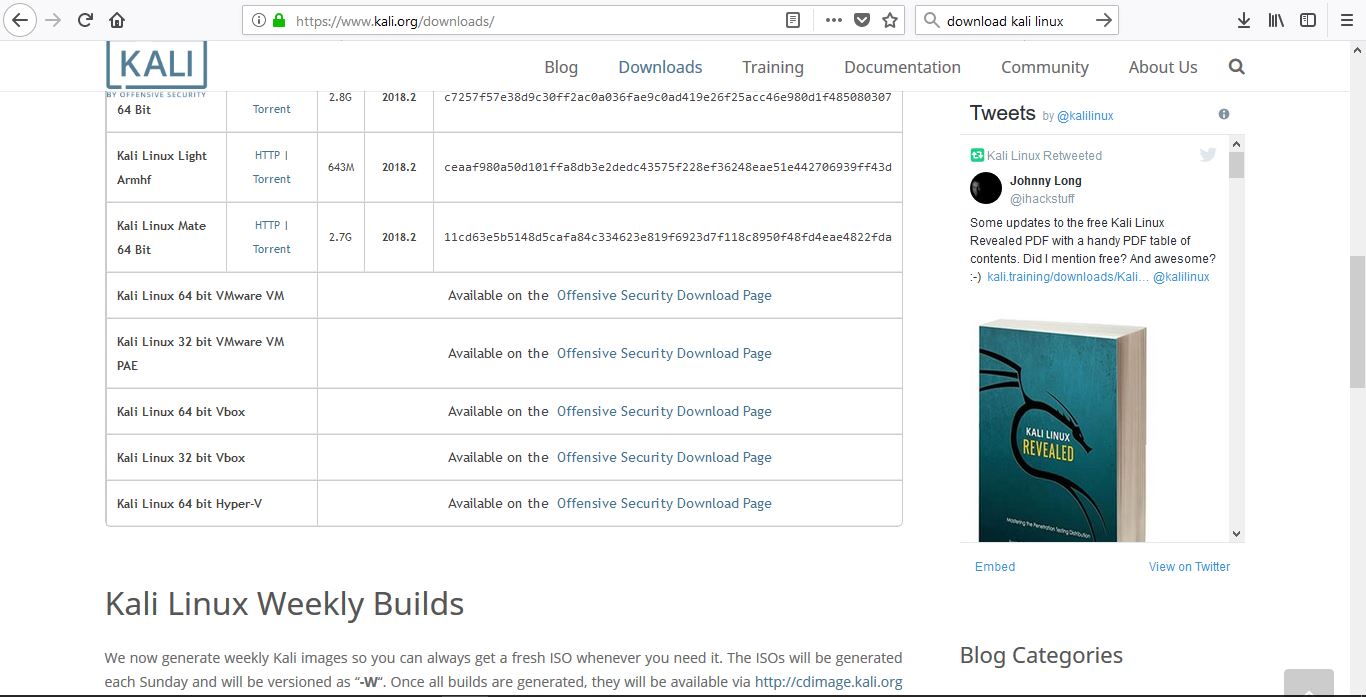
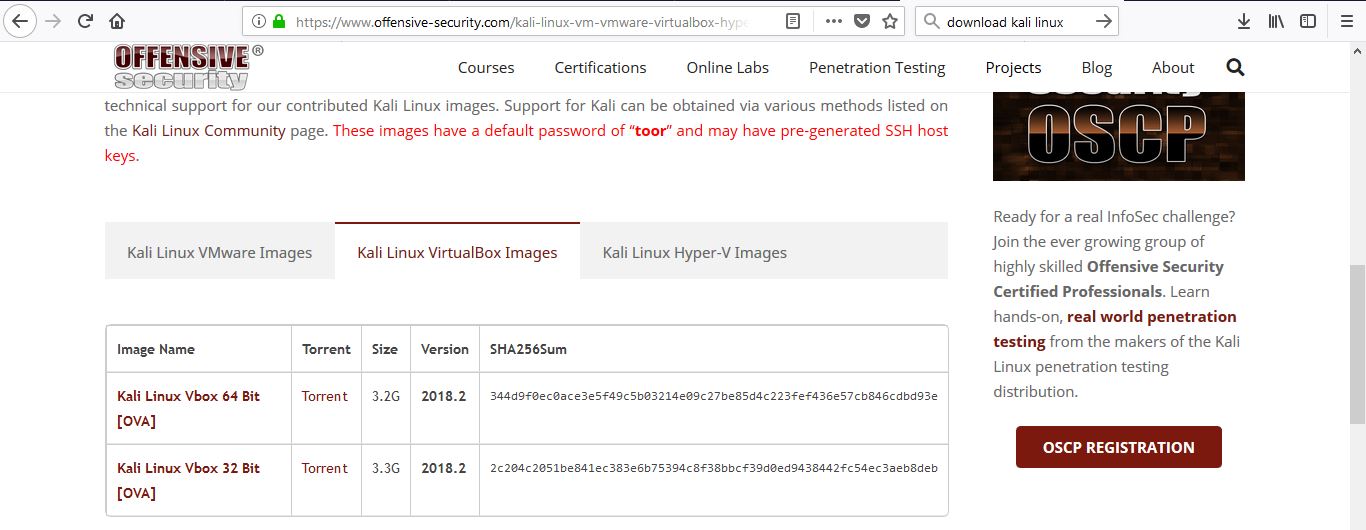
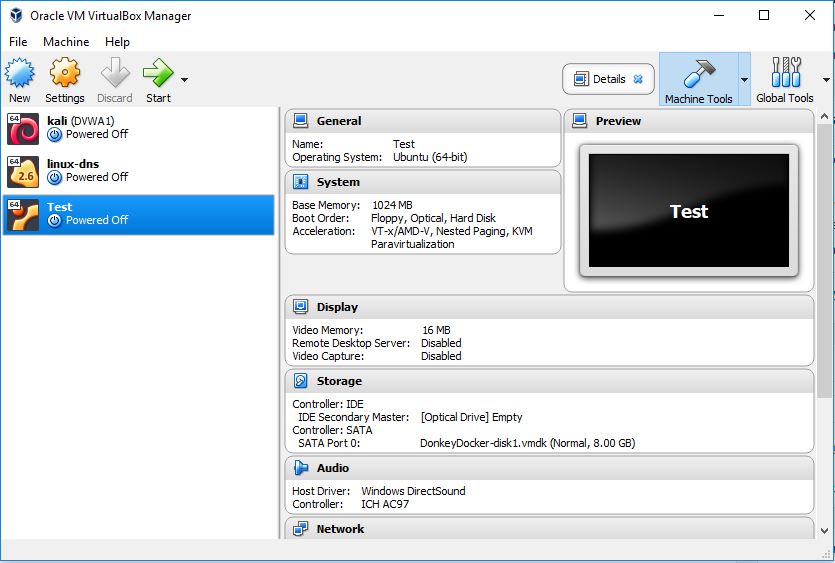
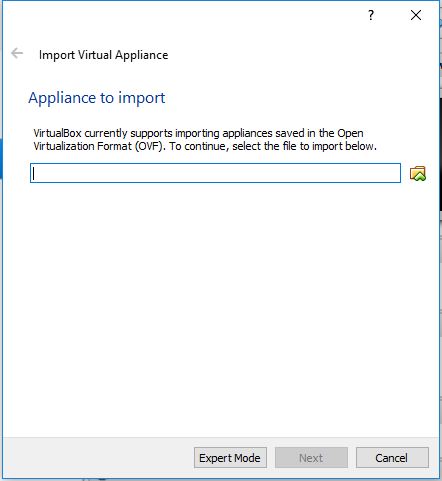
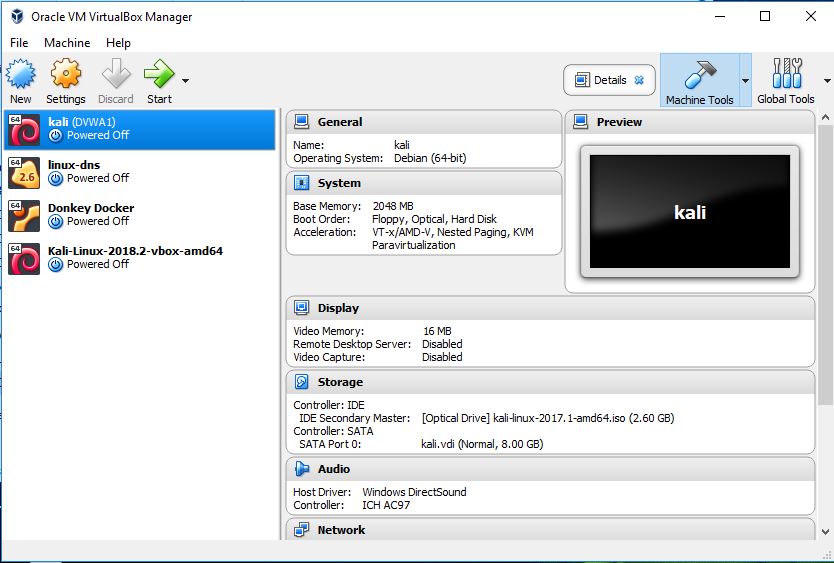
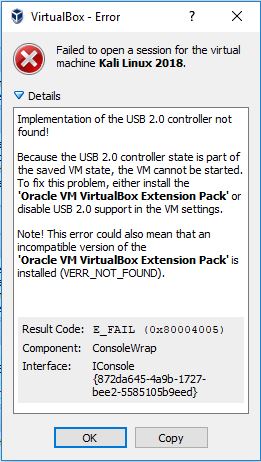
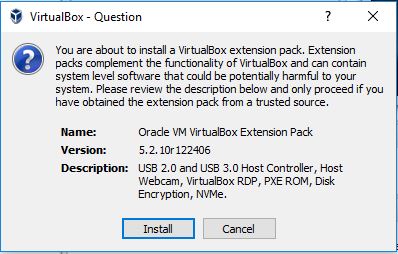
After installing DVWA in the previous post, we’ll now try to play around DVWA. What you’ll need to do first is open up your VirtualBox and load the Kali with the DVWA in it. After that, open the terminal and start your apache2 and mysql services. If you just came back from installing, you don’t need start the services again. Now, log in with the default username ‘admin’ and password ‘password’. In a moment, we’ll be directed here.

There are several options that we can choose from to start practicing. Here are examples of using it.

1. Command Injection
a. Low

Let’s try Command Injection first. Start by setting the DVWA security level to low. Click on DVWA Security in the options and set ‘impossible’ to ‘low’.

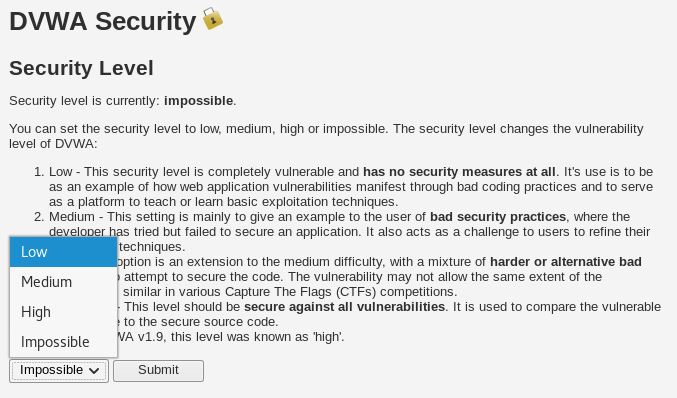
Click submit. We’ll do this frequently to change the difficulty of the ‘game’.

Now go to ‘Command Injection’, we’ll see this.


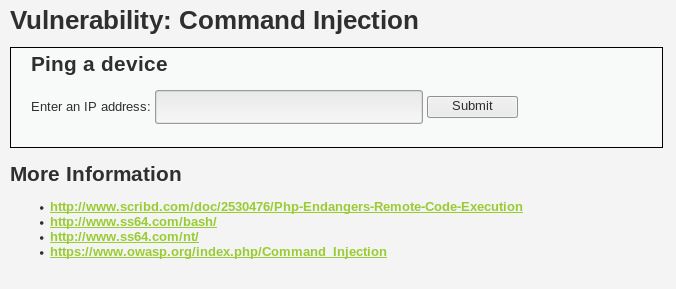
Now let’s type an address, for example, google.com and hit submit.

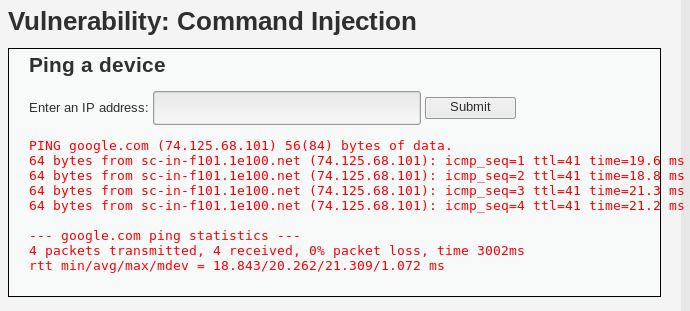
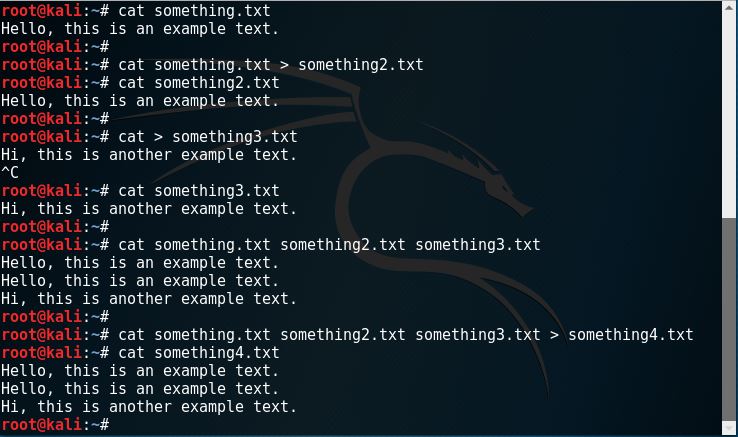
What we see here is the result of ping, the same as what we see in terminal if we ping on anything. So this raises a question, if it shows the results of ping command, will it show other command results? In terminal, when we type in multiple commands, we can use the ; (semicolon) separator. Like this.

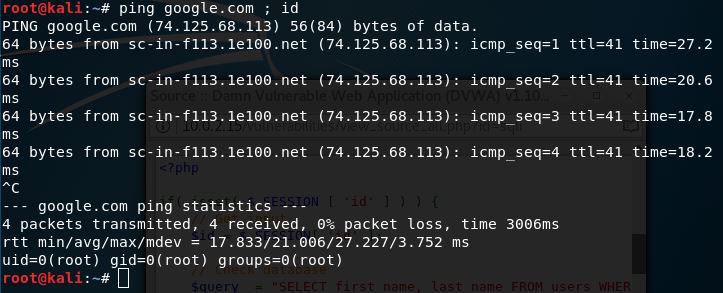
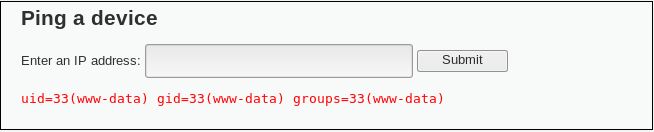
Notice that there is an extra information after ping. It shows what user we’re using currently. Now let’s try doing that in our DVWA. Type in ‘google.com ; id’ and hit submit. We’ll get this.

We get our target’s current user.

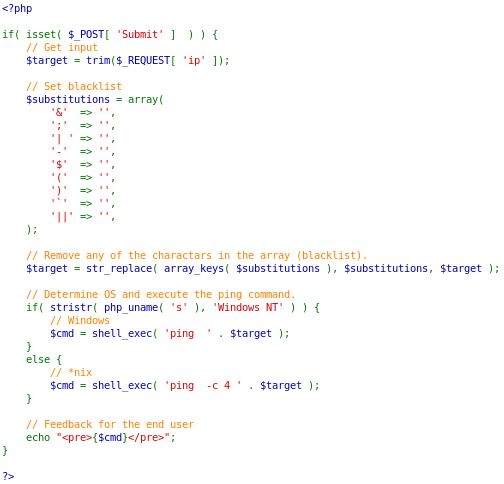
What we can also see is the source code. On the bottom right corner, we get to see the source code on the submit button.

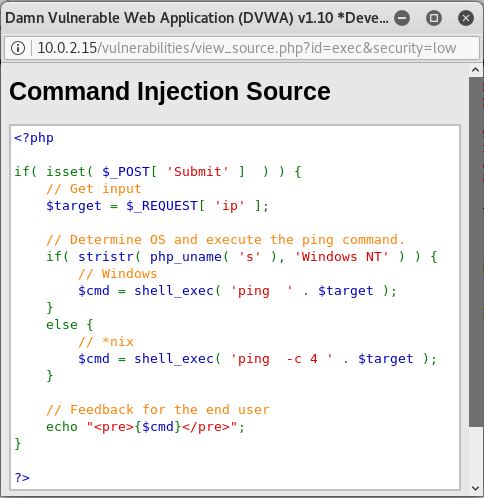
If we analyze this, we can see that the code gets what we type in, then executes it with the ‘ping’ command, then ends with displaying the results. There is a slight difference on where we use DVWA. If we use it on windows, the command only uses ‘ping’ because after 4 lines, it will automatically stop. But on Unix OS, it will continue endlessly until the user stops it. That’s why there is an additional ‘-c 4’.

b. Medium

Let’s continue on trying the medium level. Change the DVWA Security to medium, then get back again at Command Injection. Let’s try the same ‘google.com ; id’ injection that we used earlier.

You will notice that no results are shown. Let’s see the source code for this.

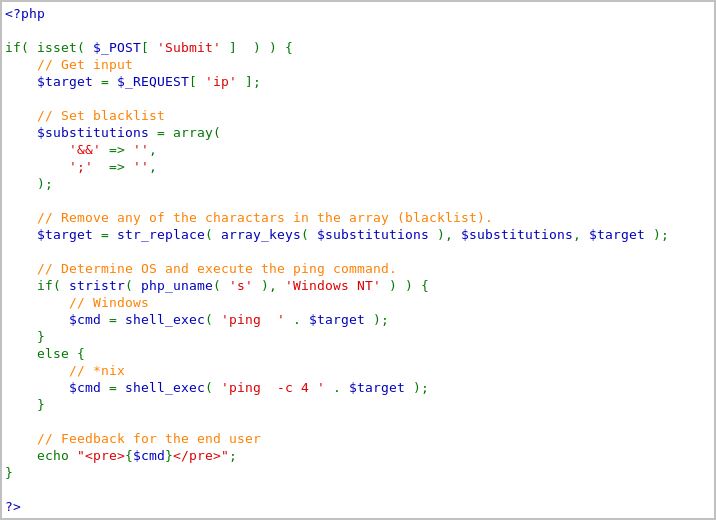
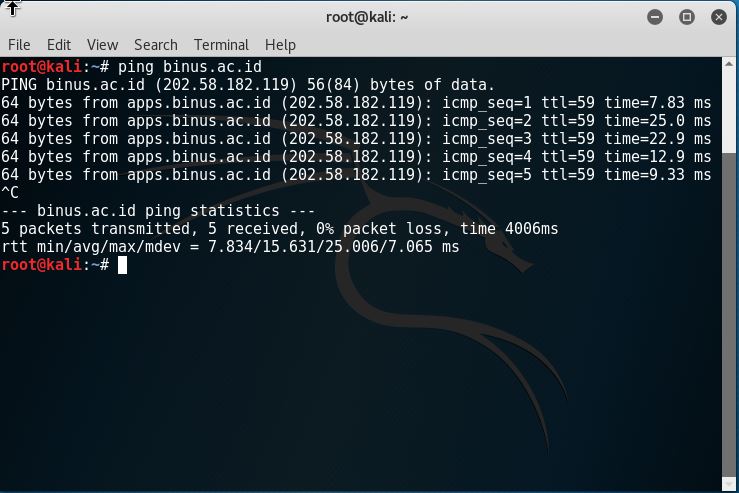
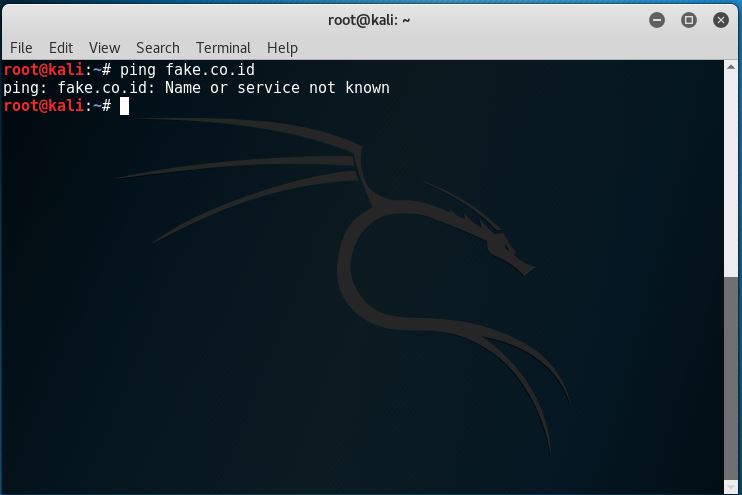
They have added a set of character blacklist, which then if the system detects any of these characters, it will be removed. This is what it looks like in the terminal if the command executes after the ; is removed.

What can we do on this level? There are other characters that we can use besides ‘;’ and ‘&&’. If ‘&&’ is blacklisted, then there should be other characters that we can use such as the | (pipe). Try typing in ‘google.com | id’ and hit submit. We’ll get this.

This solves the medium level difficulty.

c. High

Let’s change the DVWA difficulty once again to high. Come back to the Command Injection and let’s take a look of the source code.

They have added more characters on the blacklist. It may seem impenetrable now. But if you look closer, there is a ‘typo’ on the | (pipe) character. It has a space in it. Meanwhile, in the terminal, it doesn’t matter whether you use space or not. It will still work. So now, try typing in ‘google.com |id’. This time, there are no spaces in between the | (pipe) character and the next command that we want to use.

It still works.

Don’t forget that when we see the source code, if you notice, there is a ‘compare all levels’ in the bottom. Try clicking at it and see the difference between all 3 (or 4) levels of the code.

2. XSS (Reflected)
a. Low

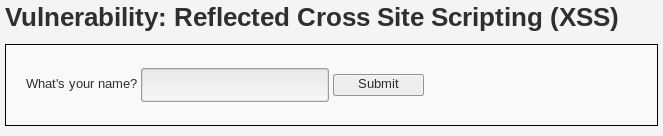
XSS (Cross Site Scripting) is one of the most popular methods in ethical hacking. Let’s start trying by setting the DVWA Security to low, then go to XSS (Reflected). We’ll see this.

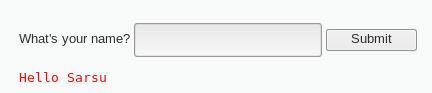
Let’s try by typing in our name and hit submit.

Now let’s try scripting. Type in ‘(yourname) <script>alert(1);</script>’ to test whether it accepts scripts or not.

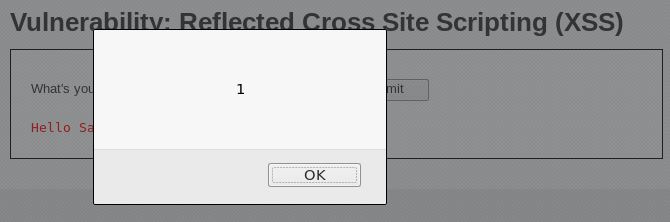
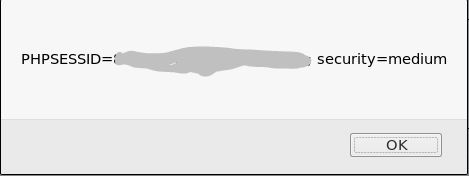
The alert popped up. Which means, scripting can be done. Let’s try doing something more useful, getting the cookie. We’ll only change the contents of the alert to ‘document.cookie’ like this: ‘(yourname) <script>alert(document.cookie);</script>.

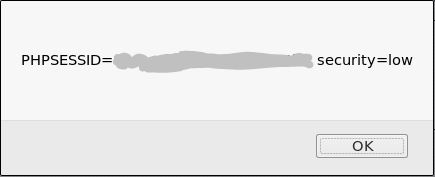
Now we have the session cookie. Why is this useful? What we can use with this information is that we can now log in without having to know what the username and password is. That’s why it’s very powerful and dangerous.

b. Medium

Let’s continue on by changing the security level to medium. Let’s see what happens if we type in the same thing previously.

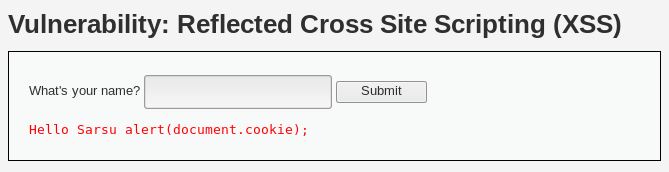
The script didn’t execute, and instead, the script tags disappeared and our code became part of the string. What happened? Let’s take a look at the source code.

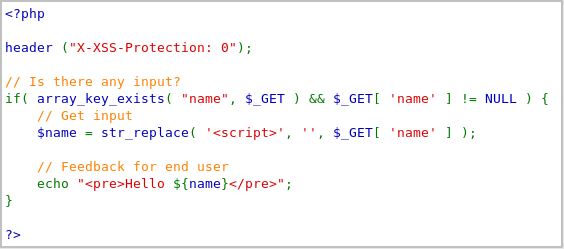
What happens in the code is that it removes any <script> tag. What can we do to overcome this? Simple. Since it’s case-sensitive, we can just modify one or several characters to an uppercase letter. For example ‘(yourname) <scripT>alert(document.cookie)</script>’.

You can still get the cookie.

c. High

Now what about the next one? Let’s look at the source code after changing the security level to high.

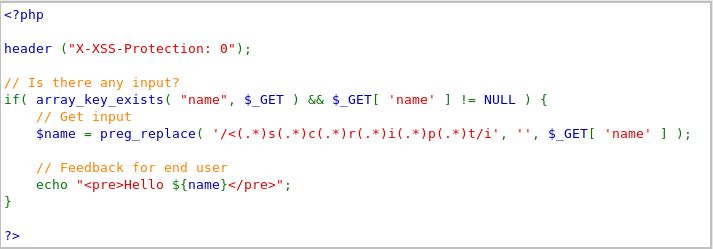
The code is now set to be case-insensitive. What can we do now? There are other methods to do this. We can change the tag to <body onload=””>.  What it does is that it executes scripts within the body of a webpage. So it doesn’t necessarily need the script tag. Try typing in: <body onload=alert(document.cookie)>.

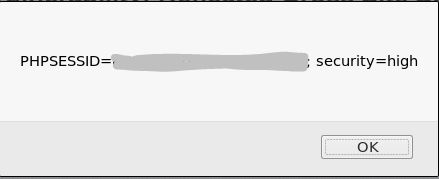
We still get it without having to type in script tags.

There are other several useful things other that we can get the session. We can also redirect to another page using: window.location(“url”).

Ethical Hacking – DVWA Installation

On this post, I will discuss about DVWA installation. But first of all, what is DVWA? DVWA stands for Damn Vulnerable Web Application. It is actually a PHP/MySQL web application that is very vulnerable for students or ethical hackers to try and test their skills of hacking in a legal environment. For the sake of learning, we will install this in our Linux within the virtual box.

Here are several steps to install DVWA

1. Open the terminal and go to /var/www/html using the cd command: cd /var/www/html

2. On the current directory, download the master.zip file for DVWA from https://github.com/ethicalhack3r/DVWA/archive/master.zip with wget. It looks something like this:

3. Unzip the file like this:

4. Check whether the file is there or not using ls.

5. Move the DVWA-master file to the web root directory like this: mv DVWA-Master/* /var/www/html

So now, we have the DVWA files inside /var/www/html and it now looks like this:

6. Change the owner of the /var/www/html directory with chown to: chown -R www-data:www-data /var/www/html

7. Set our apache and MySQL services by typing in “service apache2 start; service mysql start”. Then, type in “ps awux | egrep “apache|mysql”” like this.

8. Securing MySQL installation by typing in “mysql_secure_installation”. Make sure on the first step to fill in the password. Then just fill in yes throughout the installation.

9. Try to see our DVWA page on our Kali’s browser by typing in the local IP 10.0.2.15.

If you see this page, it means that the apache service is already running. But it isn’t exactly the page that we’re hoping to see. To get this fixed, inside the /var/www/html, we’ll see the index.html file. Remove that file and now we’ll see this.

This is almost the right page. All we need to do now is follow its instructions by changing the config.inc.php.dist file in config directory to config.inc.php like this.

We’ll get the right page after refresh.

8. After getting the right page, we’ll see a reCAPTCHA error (missing) on the bottom part of the page.

To get the reCAPTCHA keys, we’ll have to go to www.google.com/recaptcha/admin.

Then, we’ll have to add the keys to the config/config.inc.php file.

9. After resolving reCAPTCHA, we’ll have to resolve the ‘allow_url_include’. Simply edit the php.ini under /etc/php/7.2/apache2. Mind that the directory of 7.2 may be in different version. Open the php.ini file, find the ‘allow_url_include’ string, then set the value to ‘On’.

Save and exit the file.

10. Another thing we’ll have to resolve is the PHP module gd part. Simply type in ‘sudo apt-get install php7.2-gd’. A note to remember, mind the php version we use as different versions of installation might not work at all.

Restart the apache2 service and refresh our browser. We’ll see that all the red status are resolved.

11. Create the database through terminal by typing in “mysql -u root -p”, then enter the root’s password you made earlier.

12. Change the config/config.inc.php file again and change the user and password to the user that we made on the previous step.

Then, refresh the browser page and click on the ‘Create / Reset Database’. This is what you should get after that.

The installation is done! The default username is ‘admin’ and the password is ‘password’.


Ethical Hacking – Enumerating Target

Enumerating in ethical hacking is the process of getting shared resources, users and passwords of the target. Of course, there are several tools that Kali offers us to do this. Here are a few that I’m going to demonstrate.

1. wpscan

Wpscan is a wordpress vulnerability scanner. There are several uses of wpscan, including enumerating users and passwords. So let’s enumerate jo1.pentest.id and look for users.

The process might take awhile, but the long wait might also bear fruit. So here is what we get from enumerating users with wpscan.

Now that we know the username, we would like to know the password. In this case, we’ll try dictionary brute forcing with wpscan. First, we’ll have to create the ‘dictionary’. The dictionary is the list of word trials that we want wpscan to use to try breaking in. Let’s create a file called ‘pass’. Type in “nano pass” and we’ll get into the text editor.

Exit and save the file. Now we go to wpscan again and do this.

What the command does is try to use adminjo as the user and use the dictionary of passwords that we created to try and get through. It will also take awhile, or also, we might even fail to get it. There are other ways to check if we fail to get the password, but we’ll focus on this one first.

Here is the result of wpscan’s dictionary brute forcing.

2. theharvester

The objective of theharvester is to gather emails, subdomains, hosts, employee names, open ports and banners from different public sources like search engines, PGP key servers and SHODAN computer database. Let’s try using it.

From the command, -d facebook.com means that the domain we want to search on emails is facebook.com. -l 50 means that limit the search to 50 and -b all means that we search by all the search engine such as google and bing. Here are several results of the search, including several hosts.

3. Metasploit

Metasploit provides a public resource for searching vulnerabilities and gives the opportunity for the users to create and develop codes for exploiting. Let’s try and use it.

As shown above, using metasploit, we have successfully retrieved 1 email address.

References

https://wpscan.org/

https://tools.kali.org/information-gathering/theharvester

https://whatis.techtarget.com/definition/Metasploit-Project-Metasploit-Framework

Ethical Hacking – Using Maltego

The focus of Maltego is analyzing real-world relationships between information that is publically accessible on the Internet. This includes footprinting Internet infrastructure as well as gathering information about the people and organisation who own it. On this post, I will show what I have done by using maltego.

1. Open maltegoce from Applications under Information Gathering.

2. The first thing you’ll encounter is that we have to choose the maltego type we want to use. Click on the Community Edition. Then we must login. Make an account first if you don’t have one by clicking on ‘register here’. It will open your browser to the website to register.

3. After logging in just click next until you encounter the Install Transforms section. Choose Run a machine.

4. There are several machines available for us to use. The main ones are Company Stalker(gathers email information), Footprint L1(basic information gathering), Footprint L2(moderate information gathering) and Footprint L3(intense and most complete information gathering). We’d like to gather as much information as possible, so we’ll choose Footprint L3.

5. Specify our target. In my case, I’ll try to target pentest.id for learning purposes.

Click Finish.

6. Wait for awhile. If the program asks about anything, just click on yes. We’ll get to see an entire map of pentest.id after that.

Zooming in, we’ll see this.

We can see its relationships to the websites.

References

https://www.paterva.com/web7/buy/maltego-clients/maltego-ce.php

https://null-byte.wonderhowto.com/how-to/hack-like-pro-use-maltego-do-network-reconnaissance-0158464/

Ethical Hacking – Target Scoping and Information Gathering

On this post, I would like to cover up some of the Ethical Hacking Cycle steps. I mentioned these steps on my previous posts. But the explanation there was not very detailed. So, I have decided to give more explanation based on what I have learned.

a. target scoping

Target scoping would actually be the second step right after making a contract with the client. The benefits of Target Scoping is that we’ll know our objectives, we get to plan better before penetration testing and we get to save more time and energy. Here are several key concepts of Target Scoping:

1. Gathering Client Requirements
This key requires us to dig more about what the client wants us to do. It can be done by thorough communication with the client. It’s also better that we prepare questions beforehand.

2. Preparing Test Plan
Preparing the test depends on what we need. These may include shaping the actual requirements into structured testing process, legal agreements, cost analysis, and resource allocation.

3. Profiling Test Boundaries
Determining limitations on the project itself. Whether its the technology, knowledge, or restrictions given by the client’s IT environment.

4. Defining Business Objectives
Aligning business view with technical objectives of the penetration testing program.

5. Project Management and Scheduling
Management and Scheduling is also an important part so that

b. information gathering

On this step, as mentioned on my previous post, we’ll be gathering public information about our client. There are many things that can be found such as the client’s name, address, website, contact person details, email address and telephone number. There are a list of tools that we can use to look for these information.

1. Google Groups

Google has many uses in terms of searching. In google groups, we can get emails of our client. It should be useful as we can send spam messages and messages that may contain malicious software. The use of it is also to test the ‘people’ layer of the company or the individual.

Here is an example of how searching in google groups looks like.

Since this is just an example, this is a random search. It would be better if you plan on what you want to get beforehand. It’s not difficult, but if we don’t know what we’re looking for, it won’t be easy either.

2. whois

The whois command is a very common command to use for information gathering. Through this, we can get the registrant data of a domain including the name, email, address and phone number. Here is an example of whois results through the terminal.


Another way to check whois results is through the www.whois.net website. Here’s a look of how we run it there.

3. dig

4. DNSTrails / SecurityTrails

DNSTrails, now securitytrails, is a web that let’s us search for the history of any domain, the subdomains and also giving us whois results. Here is what it looks like when we use it.

Notice that there are strange letters such as A or AAAA? Here is what it means:

1. A: The A stands for Address. It gives us the IPv4 records for the given host.
2. AAAA: This one is also an address, similar to A. But the version of the address is IPv6.
3. MX: Stands for Mail Exchange. It is used by the Simple Mail Transfer Protocol (SMTP) to route emails to proper hosts.
4. NS: Specifies the authoritative name server.
5. SOA: Stands for Start of Authority. Specifies core information about a DNS zone, including the primary name server, email of the domain administrator, the domain serial number and several timers relating to refreshing the zone.
6. TXT: The text record simply holds arbitrary non-formatted text string. It is used by Sender Policy Framework to prevent fake emails.

5. Paros

Paros is one of the powerful tools for information gathering as it captures web server information and gives us possible vulnerabilities that could allow exploits. The application is already provided in Kali Linux. But if we’re using another operating system, we must first download Paros at www.parosproxy.org, which then redirects you to this website.

Make sure that we have Java J2SE installed. Then, we install paros.

After getting everything set up, we expect to be on this screen.

What we can do now is setting up the network environment. First, check the local proxy from Paros by clicking tools, then options, then select local proxy.

We can see that the address is 127.0.0.1 in port 8080. Change the connection settings in the browser by opening menu, then preferences/options, then select advanced. Click on the network and manage the connection by clicking settings.

Change the connection settings as demonstrated below.

After the settings are done, search for a website. This will show up in our Paros.

As you can see, there are some alerts; low and medium. These alerts display vulnerabilities that were found by Paros.

6. Other tools

There are many more web tools that we can use for information gathering. Here are a list of tools that may be helpful.

For information on Devices and Computers:
1. archive.org
2. www.domaintools.com
3. www.alexa.com
4. serversniff.com
5. centralops.net
6. www.robtex.com

For information on people:
1. www.pipl.com
2. yoname.com
3. wink.com
4. www.isearch.com

References

https://www.hackingloops.com/target-scoping-guide-penetration-testing-pen-test/

http://dns-record-viewer.online-domain-tools.com/

Introduction to the Paros Proxy Lightweight Web Application Tool

Ethical Hacking – Linux Basic Commands

In this part of the journal, I would like to discuss about the importance of understanding Linux, Kali Linux to be more precise. Why are we learning this? Well, Kali Linux has a lot of tools that helps us to do penetration testing (pen test). Also, most ethical hackers use Linux-based OS to do pen test.

1. cd

The first and most basic command that will be discussed here is cd. It stands for change directory. Changing directory is a very crucial thing when we work on anything. The cd command exists in most OS including IOS, Windows and so on. To put it simple, changing directory means that we can switch back and forth to wherever folder we want to work on. For example, we are on the ‘home’ directory, we want to make a file in the ‘documents’ directory. What the user can do is ‘change’ the ‘directory’ from home to documents. The cd’s syntax is cd [option] [directory]. For the example above, the use of cd should look like this:


There are several other uses of cd. If we’d like to go back to the parent directory, we can just type in ‘cd ..’. A single dot represents the current directory, while double dots represents the parent directory. Another cd use is going back to its roots by simply typing ‘cd /’. The slash represents the root directory.

2. ls

The second command is ls (the l is an L). The ls command is to list all the files in the directory. The syntax for ls is: ls [options] [file/directory] Here is an example of the ls results:

The ls command has a list of additional options to choose from:

  • ls -l: shows file’s or directories’ names, size, modified date and time, owner of the file and its permission.
  • ls -a: shows all files including hidden files
  • ls -lh: shows a more readable format of ‘ls -l’
3. ifconfig

The third one would be ifconfig. This command would be an indicator whether you are connected to the internet or not. If we use virtual machine, then make sure that your network settings is set to NAT. Otherwise it would ask you to use a cable instead of WIFI. Here is what the settings look like:

Another alternative to this issue is to change the connection into a Bridged Adapter and make sure the ‘Name:’ is the hardware device that is used to connect to the WIFI.

Another way to see whether we’re connected is to use the ping command. The ping command allows you to check both your internet connection and to test whether a host is reachable. Here is an example of ping test:

Here is also an example of a ping test that failed to connect to a host:

4. cat

cat is one of the most used commands to read, combine and create files. The syntax to cat is cat [options] [filenames] [-] [filenames]. Here are examples of how the cat command can be used.

On the first line, we can see that the cat command opens the file and writes the text out in the terminal.

The second part is a method we can use to copy a file into another file of a different name.

The third part is basically creating a new file and with us writing its contents. Don’t forget to press enter first before exiting the cat, otherwise the last line of the file won’t be written. To exit the editing mode, just press Ctrl+c.

The fourth part is opening the files and concatenate the output.

The fifth part is copying the concatenated output of the files.

This last part is to identify the use of the ‘>’ operator. When we make a file using cat for the first time, we use the ‘>’ operator. But when we want to continue adding anything on the next lines, we use the ‘>>’ operator so that the file is not overwritten.

5. nano

nano has very similar uses to cat. Only, it’s more like a text editor. To make a new file, just type in ‘nano file.txt’ this will open the text editor in the terminal with a blank page. Later upon exiting the text editor, the system will ask to confirm the file name. But if we want to open and edit an existing file, just type in the file name. Here is an example of using nano.

As you can see, there are other uses by using the guide below the file. For example, if you want to open Get Help, just press Ctrl+G.

6. mkdir

mkdir is making a new file directory (make directory). It’s useful if we want to store files according to its category.

7. cp

cp stands for copy. This command simply copies a file or directory into another new file or directory. Here is an example how to use it.

So we type in ‘cp’, then specify the file/directory we want to make a copy of, then specify the name for the other copy.

8. rm

rm stands for remove. The command, as it says, removes (deletes) files that we want. But it doesn’t ask for confirmation to execute so we have to be careful on using this command.

9. clear

This command clears the screen of the terminal so that we can work easier. Here’s an example of using the clear command.

10. passwd

We might forget our passwords sometimes. With the passwd command, we may change our current user’s password by typing in passwd and input the new password twice.

11. mv

mv stands for move. This command moves a file to another location. It may as well rename a file.

Here is an example of moving a file.

Here is an example of renaming a file.


Ethical Hacking – Getting the Environment Ready

To get started on ethical hacking, we must first get our computer environment ready. We’ll be needing Kali Linux for the rest of the class. So what we need to do is download a Virtual Machine. On my case, I use Oracle VM VirtualBox.

1. Go to https://www.virtualbox.org/wiki/Downloads and click on the link that corresponds to your current operating system. Download it and install.

2. Once the installation is done, we’ll have to Kali Linux file. Get the file from www.kali.org/downloads/ and find Kali Linux 64 bit Vbox.

We’ll then be redirected to https://www.offensive-security.com/kali-linux-vm-vmware-virtualbox-hyperv-image-download/. Click on Kali Linux Virtual Box Images and click on Kali Linux Vbox 64 Bit [OVA]. The download takes awhile as it’s a very big file.

3. After the download has finished, open the virtual box that we installed previously.

Click on File and then Import Appliance.

Browse for the Kali Linux OVA file and then click next.

4. After finishing all the steps, we can finally use Kali Linux. Click on Kali Linux and then click start or just double click it.

If you ever get an error like below, then you must install the extention pack also available on https://www.virtualbox.org/wiki/Downloads.

Double click on the file that’s already finished downloading. This will show.

Click install and finish any requirements, and we’re all set.

The default name for it is root and the password is toor.

Ethical Hacking – Why We Learn

In our current time, it is inevitable that technology-based activities are rising. Almost everything we do now is technology-based from communicating, commuting, transactions, etc. Of course from these actions, we may have given our private data knowing and unknowingly. Not only us, big corporations must have an internal data. But that rises a question. Is it safe?

A lot of us think that our data is safe and sound, stored somewhere that even we don’t know. The truth is, a lot of it still isn’t. We still hear cases where companies or people get their data leaked. Most people say that they got ‘hacked’. Let us get this straight first. Hackers are ethical professionals who gets into our security system to later upgrade the security itself while crackers get into our system and get data for their own benefits, which is illegal and unethical to do.(Sethna, 2016). So to put it in simple words, hackers are the good guys and crackers are not. There are also other terms for hackers, Black Hat and White Hat hackers. A Black Hat is similar to Crackers and a White Hat to an Ethical Hacker.

So now that we solved the first question, another pops up. What can we do to keep our data safe? We could increase our security by hiring a hacker or even hacking ourselves. If we ever want to do it by ourselves or help others, we could do it by learning how to do it.

Ethical Hackers try to enter the system by penetration testing (pen test). What is pen test? It is a legal activity that is done by an ethical hacker without violating the rules. Usually, an ethical hacker does this with an agreement that has been made by a company or the other party to get in their system.

An even deeper dive in pen test is security test. Security tests are done in order to strengthen the system’s security. Giving solutions to the company of what can be done to resolve security problems.

Aside from the agreements that can be made with a company, there are also a set of laws. It is different in every country. In Indonesia for instance, they use UU ITE No. 11 2008 and UU ITE No. 16 2016. It is crucial for each and every ethical hackers to read the laws for the current country they live in to make sure they don’t violate anything.

Another thing I would like to brush up on is about 10 steps in Ethical Hacking Cycle. In a short review, the Ethical Hacking Cycle are steps that Ethical Hackers might need to follow in order to increase the chance of success. Here are the 10 steps:

  1. Target Scoping: Defining the objectives, requirements, limits and plans of the test.
  2. Information Gathering: Gather information about the target using public resources.
  3. Target Discovery: Gathering information about the target’s system architecture.
  4. Enumerating Target: Search for openings on the system.
  5. Vulnerability Mapping: Identify and analyze any vulnerabilities found.
  6. Social Engineering ( Optional ): Tricking the target’s employee, or just the target, so that he/she makes the openings for us. This step focuses on the ‘people’ layer of the target.
  7. Target Exploitation: Getting into the system.
  8. Privilege Escalation: Gaining higher access of the system. Usually, Ethical Hackers try to get the root access.
  9. Maintaining Access: Making sure that we still have access. Usually by not doing something suspicious or strengthen the defense against other hackers.
  10. Documentation and Reporting: Making a report based on our findings with documentation and also giving the solution on how to prevent future attacks.

But the most important thing to do before performing any hacking, we have to get the owner’s or company’s written consent/agreement to hack in their system.

References

Sethna, J.(2016, July 16). Hackers vs Crackers: Easy to Understand Exclusive Difference. Retrieved from: https://www.educba.com/hackers-vs-crackers/


Multimedia Final Project Report

Introduction

For this semester’s final project, my partner and I are making a simple educational game for children around the age of 5 (as mentioned before in the proposal). The objective of this game is to introduce new vocabularies in English. The project was made in around 3 days.

Planning

At first, the game was to be called “Fruits and Vegetables” because the game only consists of 2 games, the fruits and the vegetables. The objective is to pick one out of eight sprites that corresponds to the text that is shown and adds the score for right answers. For wrong answers, the score does not add up and triggers a ‘wrong’ sound.

We split the job into two parts. The first part is the programming. The second part is the design. The part I’m handling is the programming and I leave the design searches to my partner. The design for the sprites and backgrounds are taken from the Internet.

Execution of Plan

  1. Program
    • We encountered several difficulties for cursor hovering. We found that we can only use the ‘set cursor style’ to one object at a time. For instance, we have 2 buttons that we want the cursor to change to hand style when we hover over them. But only one gets the hand, whichever the last hand code goes to. After looking up to the Internet, the only solution was making an invisible box for hovering (changing the cursor style). So we used invisible boxes behind buttons and sprites.
    • It took quite awhile to understand arrays in Construct 2. At first, we entered our objects as a variable. After debugging, we still don’t see the items we want inside the array. We looked for it up on the Internet again and found out that we have to declare it one by one at the start of the layout in the event sheets. So we did that also.
    • We thought about how small it is to just have 2 choices, so we made 2 more, colors and shapes.
    • Since it is not only fruits and vegetables, we decided to change the title to “Learn and Play!”
    • We discovered some bugs on the hover-click animation. It seems that the clicked does not show up at first. After asking a few friends, we were told that the animation is just covered by the one that’s larger (hover animation). So the solution was to use groups. We call it “(Button)Hover”. Within is the command to change the animation from default to hover and vice versa. When the sprite is clicked, we make the group deactivated and thus showing the clicked animation.
    • We used a global variable for music play. 1 for on and 0 for off.
  2. Design
    • Some pictures or buttons that we want aren’t as catchy as they should be for younger players. So we decided to use Canva-a designing site-to overcome this problem. My partner did most of the job for designs.
    • For all the buttons, we have 3 designs; default, hover and clicked. Default is the default animation when the button is not hovered nor clicked. Hover is when the cursor gets on top of the button itself and the clicked is when the button is clicked.
    • We designed all the shapes and colors. Both also have 3 animations like buttons.
    • Sprites in fruits and vegetables are obtained from the Internet.
  3. Music
    • This is the additional feature that we didn’t consider before.
    • We used Stardew Valley’s songs (created by ConcernedApe, Developer) for all the background music.
    • We used some sound effects taken from the internet by various-yet unknown-artists.

Gameplay and Documentation

The first time the game launches, the player will be given three options; to start playing, to look at how to play the game, to see the credits. This is shown as the picture below.

Let’s say the player picks to start the game. The player is then given various options. There are four types of topics that may be played; fruits, vegetables, shapes, colors.

Say that fruits was chosen by the player. The real game starts and the player must choose the right picture as said on the text.

The score adds and a bell sound will play with every right answers and the animation of the fruit disappears. On the contrary, if the player chooses the wrong answer, the score doesn’t add, a ‘wrong’ sound will trigger and the animation will not disappear.

Once the player finishes the game-getting all the answers right, the text will show ‘Well done!’ for completing the game as well as to praise the player.

Conclusion and Recommendations

We made this game in 3 days, including the designs and music. It wasn’t that hard to use Construct 2, but it gets confusing sometimes because we’re still unfamiliar with the features that it has.

To design a game, do test on one level. After finishing the level’s programming, just copy paste it to the other layouts. Since this is our first big project, the codes are still untidy and it confuses ourselves sometimes.

An addition after our final presentation, there were some changes that has to be made. First is changing the background of shapes and colors game. We changed it to a more colorful one compared to the previous one, which was white. The second part is adding more to credits by changing ‘unknown artists’ to the name of the website.

Credits

Concept: Sarah N. Sukamto, Santi Amelia Andrini
Program: Sarah N. Sukamto
Design: Santi Amelia Andrini, shutterstock.com, wallpaperscraft.com, guoguiyan.com, pinterest.com, freepik.com, flaticon.com
Music: ConcernedApe (Stardew Valley Game Developer)
Sound Effects: freesounds.org

Multimedia Final Project – Learning Games for Children

For this semester’s multimedia final project with my partner would be a simple clicking game. The objective of the game is to click the picture, or in this case, sprite, of the name of the fruit/vegetable that is asked to the player. If the player succeeds to identify the object, the score will add up. But, if the sprite chosen is wrong, the player would get the notice that the answer is wrong. The score will not be reduced because it’s part of the learning, when we make mistakes, we gain more knowledge, so there is no point on reducing the score.

This clicking game will be made easy because the target players are children under 5 years old. The animation used will be simple and understandable for the children.